UO Image
Contents
Maps
{{UO_Image|map|facet|x|y|r|b|magnify=xxx|caption=xxx}}

Where:
facet = felucca, trammel, ilshenar, tokuno, ter mur, or eodon
x and y = coords of the center of the circle
r = the radius of the circle to draw (in pixels)
b = optional, set to 'yes' to also show the coordinates of the center of the circle
magnify=xxx = optional.  set 'xxx' to the amount to magnify the image. (2 = 200%, 3 = 300%, etc)
caption=xxx = optional.  set 'xxx' to the desired caption for the map

Examples:

Vesper {{UO_Image|map|felucca|2926|842|215}}
Kotl City {{UO_Image|map|eodon|577|2371|153}}
Sea Market {{UO_Image|map|trammel|4550|2355|75|yes}}
Result:
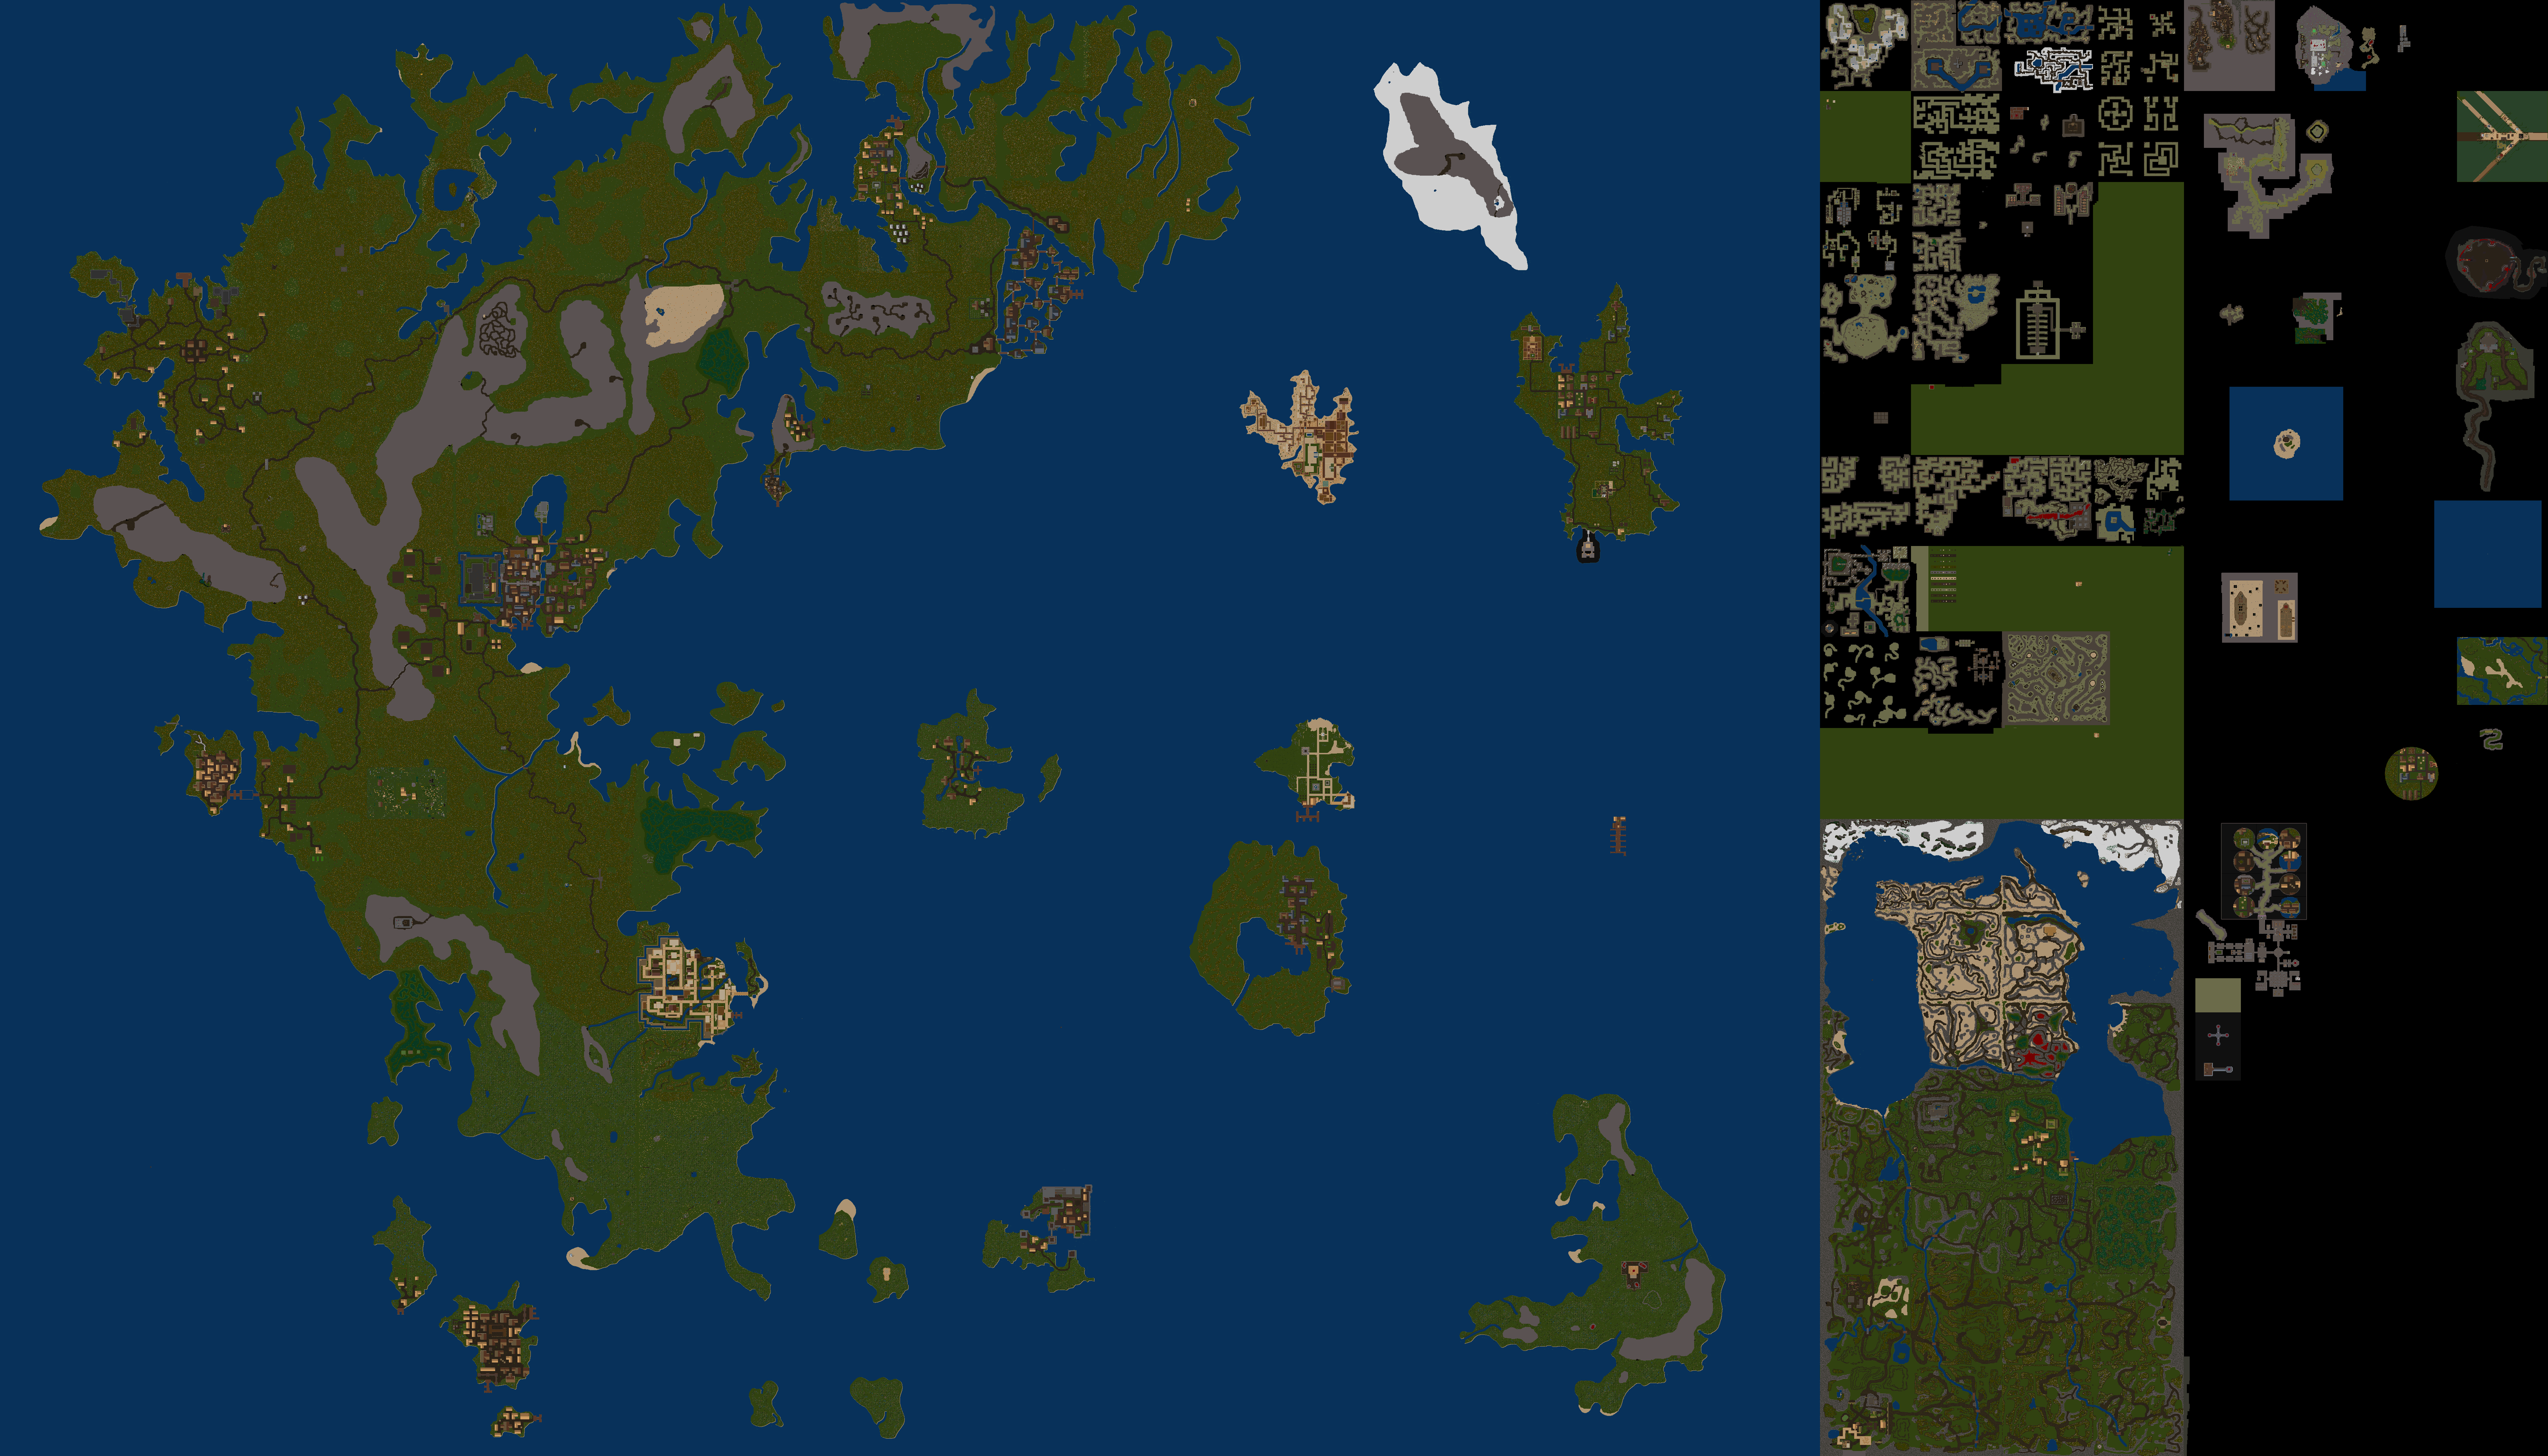
{{#ifeq: map|image|[[File:UO-Image-.pngFelucca }}

{{#ifeq: map|image|[[File:UO-Image-.pngEodon }}
{{#ifeq: map|image|[[File:UO-Image-.pngTrammel }}
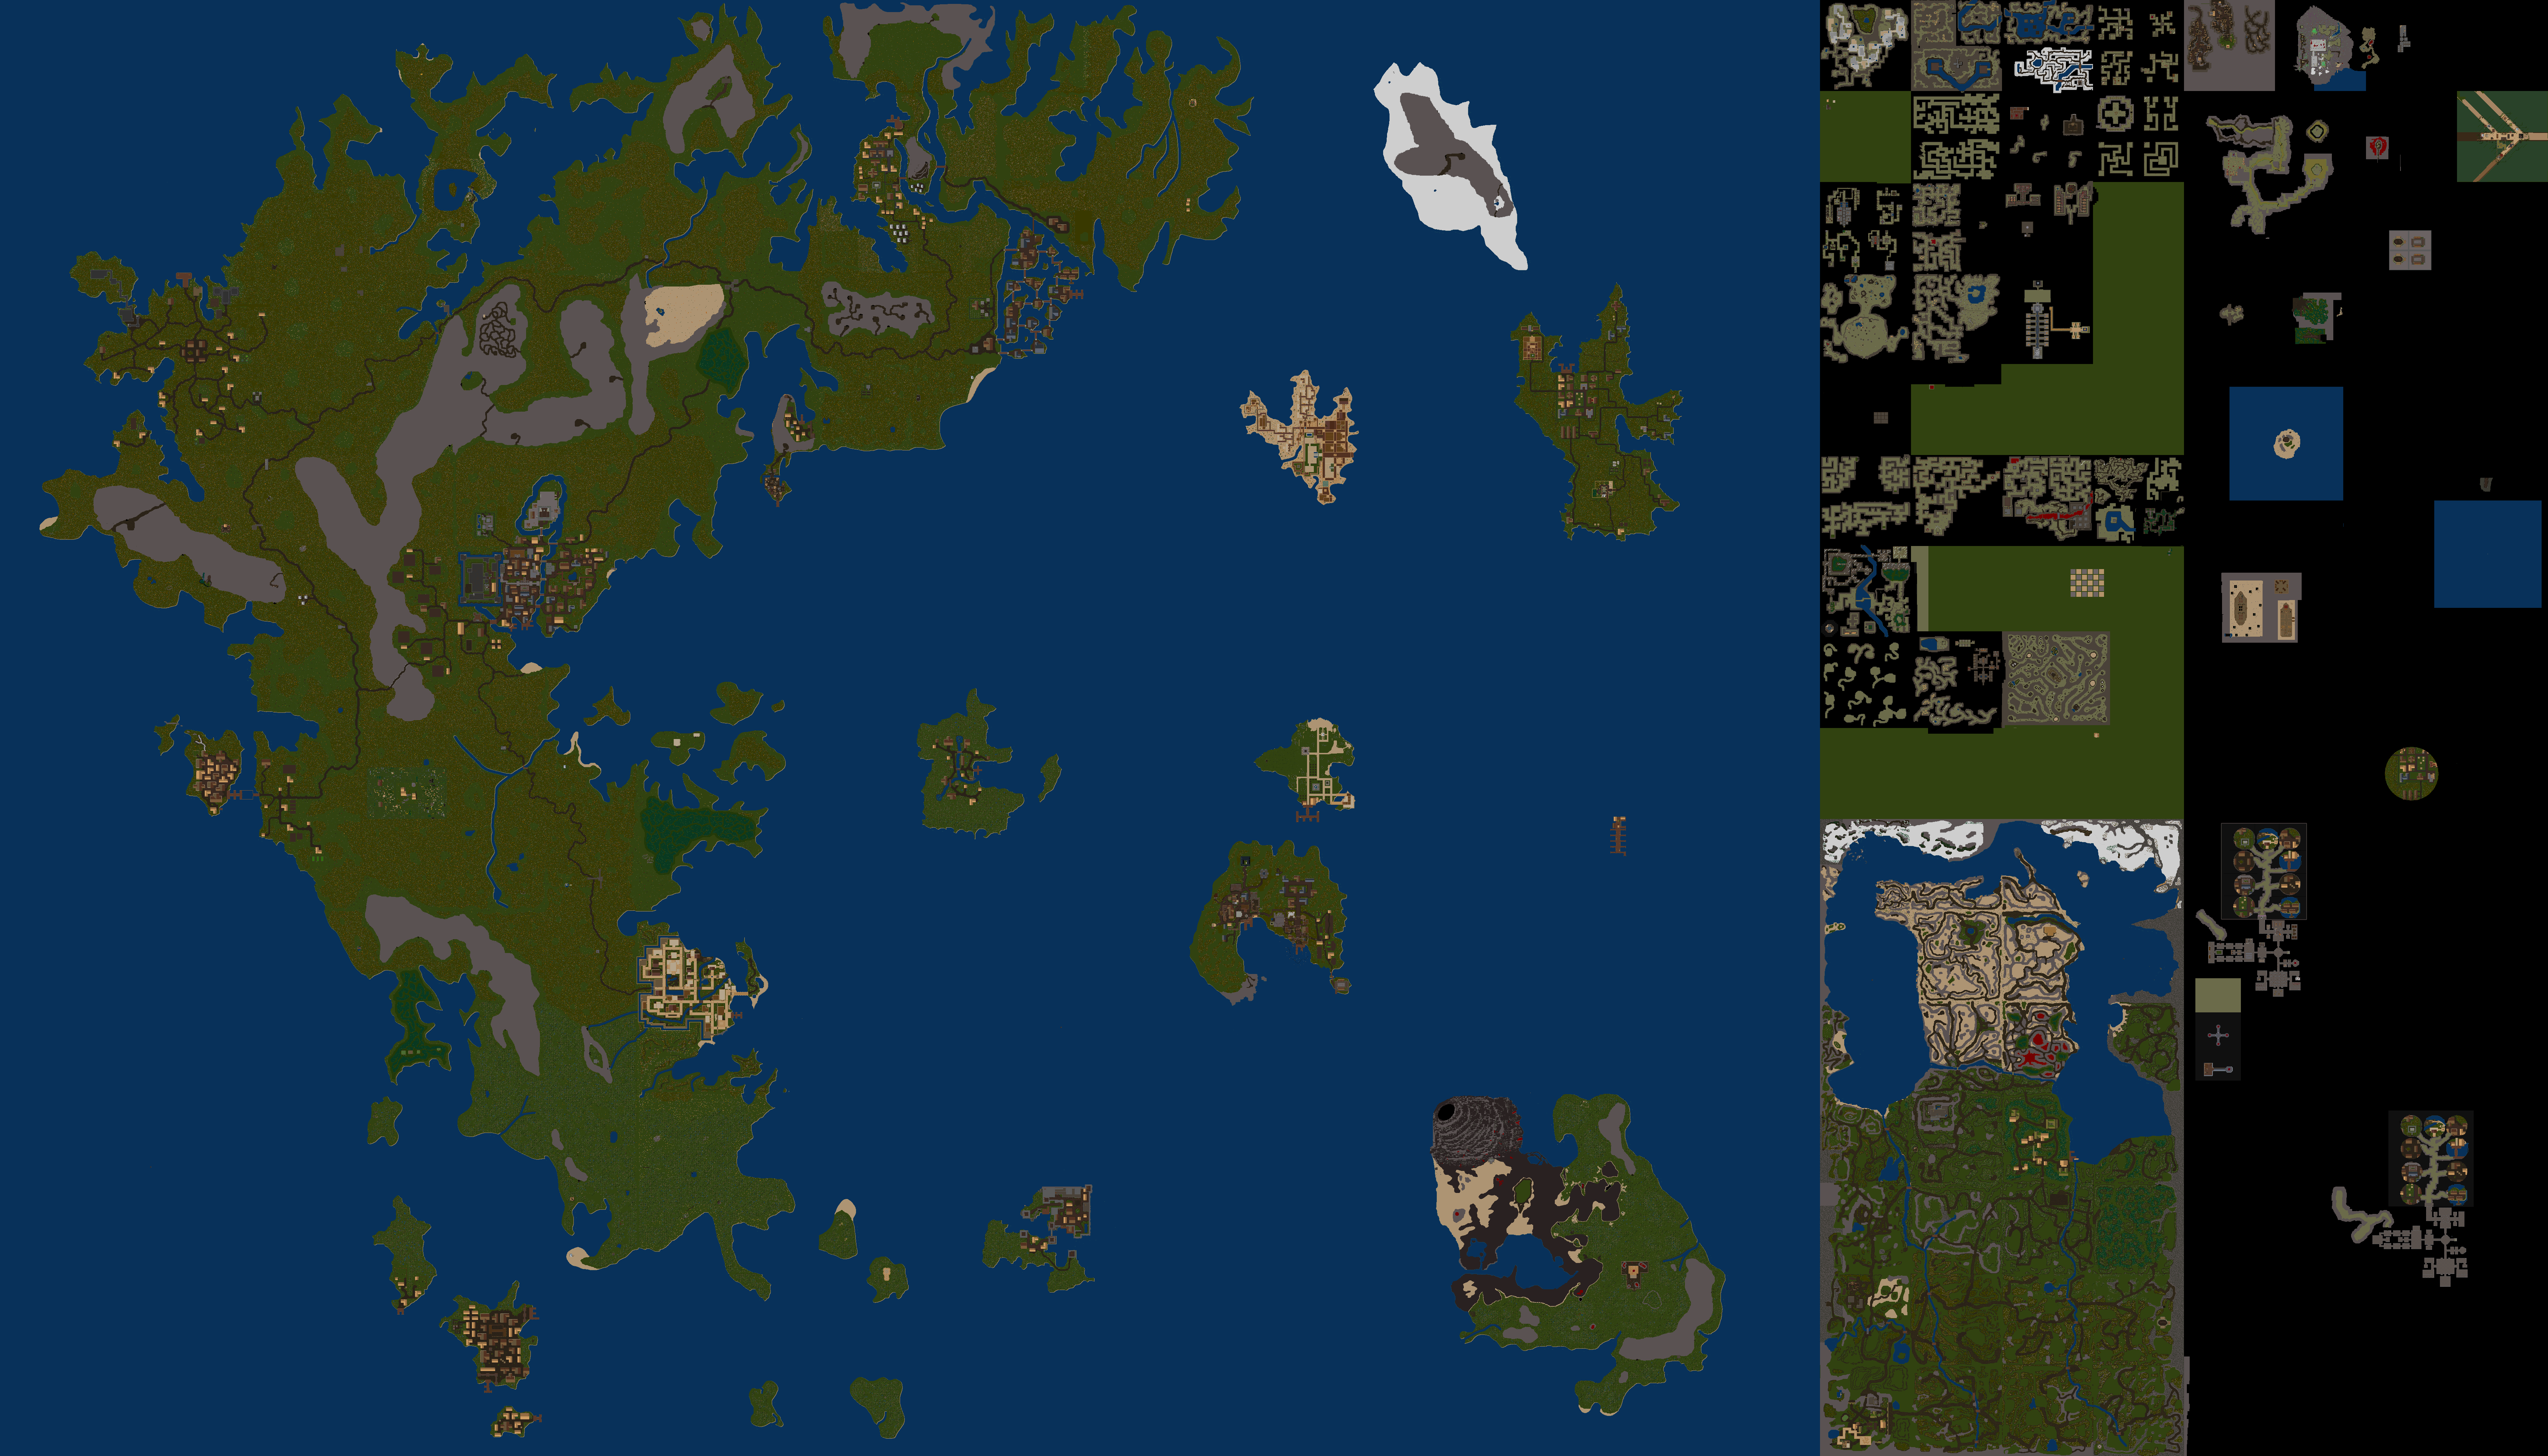
You can also use sextant coordinates.
{{UO_Image|map|facet|c|x|NS|y|EW|r|b}}

Where:
facet = felucca, trammel, ilshenar, tokuno, ter mur, or eodon
c = coordinate system:
- 1 = Britannia (Tram or Fel)
- 2 = Lost Lands
- 3 = Ilshenar
- 4 = Malas
- 5 = Tokuno
- 6 = Ter Mur
- 7 = Eodon
x and y = sextant coords of the center of the circle.  Use a comma to separate degrees from minutes.  (For 123o 8'N, you would use '123,8'.)
NS = N or S, whichever is applicable for the sextant location
EW = E or W, whichever is applicable for the sextant location
r = the radius of the circle to draw (in pixels)
b = optional, set to 'yes' to also show the coordinates of the center of the circle

Example:

Location on Ice Island at 123o 8'N 172o 59'W {{UO_Image|map|felucca|1|123,8|N|172,59|W|75|yes}}
Result:
{{#ifeq: map|image|[[File:UO-Image-.pngFelucca }}
Shard Shields
{{UO_Image|shard|name|size}}
Where:
name = the name of the shard
link = optional, the name of the page you want linked to from the image.
size = optional, size in pixels.  By default it is 60px.

Examples:
Baekdu: {{UO_Image|shard|Baekdu}}
Chesapeake: {{UO_Image|shard|Chesapeake}}
Formosa: {{UO_Image|shard|Formosa}}
Yamato: {{UO_Image|shard|Yamato|60}}
Result:
 {{#ifeq: shard|image|[[File:UO-Image-.pngBaekdu }}
  {{#ifeq: shard|image|[[File:UO-Image-.pngChesapeake }}
  {{#ifeq: shard|image|[[File:UO-Image-.pngFormosa }}
  {{#ifeq: shard|image|[[File:UO-Image-.pngYamato }}
Icons
{{UO_Image|icon|name|size}}
Where:
name = the name of the icon
size = optional, size in pixels.  By default it is 40px.
Valid icons:
 {{#ifeq: icon|image|[[File:UO-Image-.pngCaution }} Caution
Common Images
{{UO_Image|image|itemname|text}} Where: itemname = the name of the item, one of: * Batwing * Blackmoor * Black Pearl * Blood Moss * Bloodspawn * Daemon Blood * Vial of Blood * Bone * Brimstone * Daemon Bone * Fertile Dirt * Dragon's Blood Old * Executioner's Cap * Garlic * Ginseng * Mandrake Root * Eye of Newt * Nightshade * Obsidian * Pig Iron * Pumice * Sulfurous Ash * Spiders' Silk * Nox Crystal * Serpent's Scale * Grave Dust * Volcanic Ash * Dead Wood * Wyrm's Heart * Dragon's Blood text: optional, use 'no' to suppress the descriptive text for the image being included. Examples:
- {{UO_Image|image|Dragon's Blood}}: {{#ifeq: image|image|[[File:UO-Image-16503-0.pngDragon's Blood }}
- {{UO_Image|image|Dead Wood|no}}: {{#ifeq: image|image|[[File:UO-Image-3984-0.png }}